Pen Video Drawings


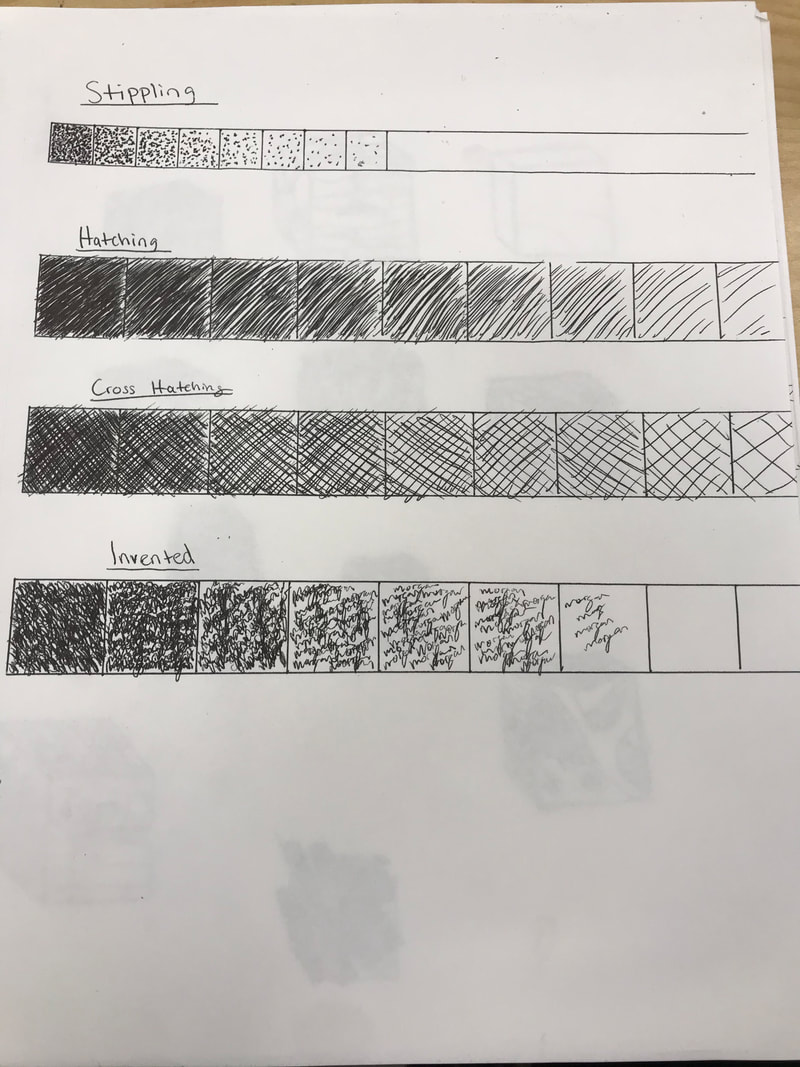
We had to create a value chart using the different pen and ink techniques below: stippling, cross hatching, hatching and invented. Above, we watched four different videos describing different techniques to shade in shapes and create several textures. The first video showed us how to create different textures within cubes. The next showed us how to create different textures in a cylindrical shape, to me, it resembled different parts of a tree. The next video showed different textures within spheres. The final video showed us different shading techniques within spheres.
Pen value chart
Assessment Drawings


The first assessment drawing is a self-portrait or drawing of a person. I decided to draw one of my friends based on a picture that I had of him. The second drawing is a one point perspective drawing of a city street. The street gets smaller and smaller in the center of the paper, as do the buildings. The third drawing is of a shoe with laces, I drew this with the actual shoe in front of me, it was easier to look at the shoe in person, to make the smaller details look more realistic on paper. The final drawing was of a hand, in the past I had never drawn many hands before now. I have finally been able to draw more realistic hands, the smaller details and lines of the hands shows this.
Still Life Object Practice

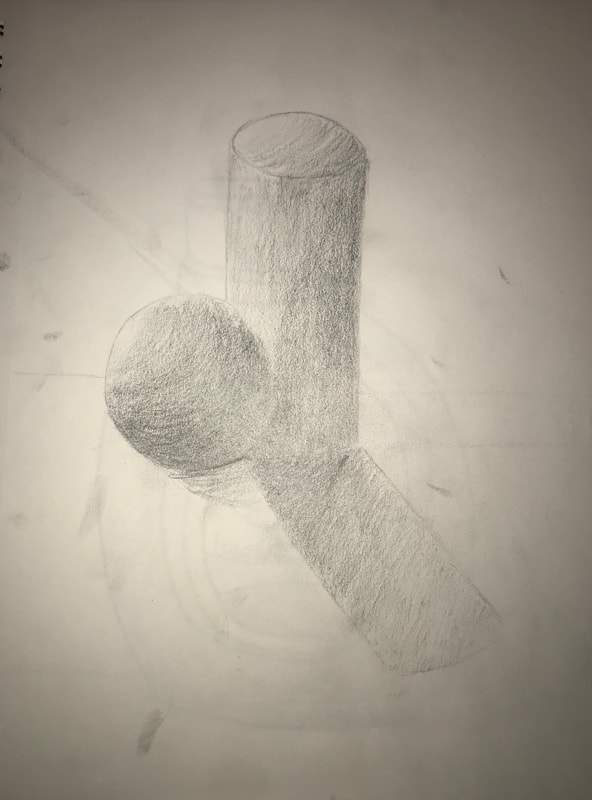
In the still life drawings tonight, we drew a few different objects and shapes with different values and shades to show depth and light/darkness. In the top picture we made a made a chart of 9 different values. The harder you press as you go along, the darker the effect, while the lighter you press, the lighter the effect. In that same picture, we started drawing shapes such as spheres, cubes, and cylinders. With the sphere, the shading is in a circular motion, the area of the sphere that is hit by the light, is lighter than the opposite end where the sphere is hit by the least amount of light, this is the spot where it is darkest. While drawing the cube, the area with the least amount of light, is again, the darkest shaded spot. The area hit by the light, has the lightest shading. In the bottom drawing, the sphere is overlapping and in front of the cylinder. The light is hitting the sphere and cube away from us, so it is the lightest area. This type of drawing really focuses on shadows and the way the light hits the objects, so the shadows really show the direction of the shapes and the light.
Still Life Final Drawing

Describe how you arranged your composition. Discuss your use of the elements and principles. Is it a successful composition?
The Tide container was arranged in the angle that we were supposed to view and draw this object already. From my seat, the my angle and view of the container was directly to the very front. The light hit the upper left corner of the object, so the bottle slowly got darker from upper left to bottom right. I believe this drawing is a successful composition, it correctly show the area of light and the areas of darkness, although some of the lines could have been better or straighter. The container had a small shadow directly below the object, as it outlined the very bottom, I could have made the shadow a little darker and larger to give the Tide bottle a bit more depth.
The Tide container was arranged in the angle that we were supposed to view and draw this object already. From my seat, the my angle and view of the container was directly to the very front. The light hit the upper left corner of the object, so the bottle slowly got darker from upper left to bottom right. I believe this drawing is a successful composition, it correctly show the area of light and the areas of darkness, although some of the lines could have been better or straighter. The container had a small shadow directly below the object, as it outlined the very bottom, I could have made the shadow a little darker and larger to give the Tide bottle a bit more depth.
Perspective Drawings


Each of these perspective drawings are characterized by the amount of vanishing points there are. With one point perspective, I had to create a single vanishing point near the center of the paper, all the lines from all the shapes point to and from this direction. Two point perspective required two vanishing points on separate sides of the paper, the lines of one side of a shape or object is directed/pointed towards one point, while the other side's lines are pointed towards the other point. For three point perspective I made three vanishing points, two points on opposite sides of the paper and one point towards the top, in this drawing I simulated someone looking upwards towards the top of a building. The last drawing was the three point birds eye view, this is if you were looking downwards towards the bottom of something, while still being able to see the top of the object.
